Showing posts with label Material design. Show all posts

Bottom Navigation View With Fragments

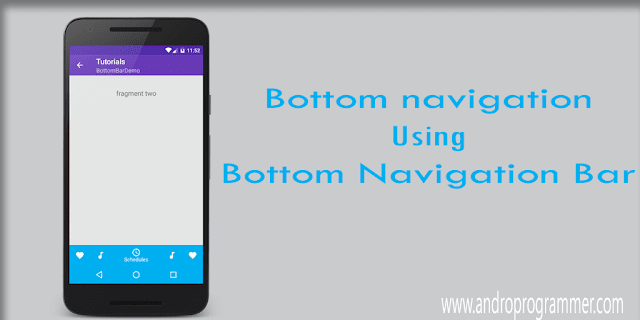
In March 2016 support design library update Google announced that there’s a new element to be added in Material Design components and it’s the Bottom Navigation View. As per documentation it should be used when application has three to five top-level destinations. Basically this is same as Tab Layout but with some more enhancement and animations. Although it is same but you can not use view pager with it. as it also explained as bad practice by google material design guidelines.

Why we need Bottom Navigation View and Tab Layout both ?
This is really great question we should ask google support library developers. but according to me most of the people liked to use phone with just one hand. with that and huge size of mobile screen you can change tabs if they are at bottom not on top. so may be considering UIUX google may have added this beautiful component in support library so you can implement it with back word compatibility also.

Today in this tutorial I am going to cover Bottom Navigation View with fragments. In Bottom view you can provide options using menu resource file or using inflateMenu(int resId) method. For this tutorial i have used five (max) value so you can confirm how it looks.


androprogrammer.com


To add Bottom navigation view you have to include support design library.
compile "com.android.support:design:25.0.1"

Now you have to put bellow code in your layout file.
<?xml version="1.0" encoding="utf-8"?>
<android.support.design.widget.CoordinatorLayout
    xmlns:android="http://schemas.android.com/apk/res/android"
    xmlns:app="http://schemas.android.com/apk/res-auto"
    android:layout_width="match_parent"
    android:layout_height="match_parent">

  <RelativeLayout
      android:layout_width="match_parent"
      android:layout_height="match_parent">

    <FrameLayout
        android:id="@+id/fragmentContainer"
        android:layout_width="match_parent"
        android:layout_height="match_parent"
        android:layout_above="@+id/bottom_navigation"
        />

    <android.support.design.widget.BottomNavigationView
        android:id="@+id/bottom_navigation"
        android:layout_width="match_parent"
        android:layout_height="wrap_content"
        android:layout_alignParentBottom="true"
        app:itemBackground="@color/primary_green"
        app:itemIconTint="@drawable/nav_item_color_state"
        app:itemTextColor="@drawable/nav_item_color_state"
        app:menu="@menu/bottom_navigation_main"
        app:layout_scrollFlags="scroll|enterAlways|snap"
        />

  </RelativeLayout>
</android.support.design.widget.CoordinatorLayout>

app:menu : Menu resource file (options to be displayed).

app:itemIconTint : Change icon color when gets selected.

app:itemBackground : background color by default it will be your app primary color.

Now layout part is set. For color codes and images and other resources check out my repo on Github.

BottomBarDemo.java
package com.androprogrammer.tutorials.samples;

import android.os.Build;
import android.os.Bundle;
import android.support.annotation.NonNull;
import android.support.design.widget.BottomNavigationView;
import android.app.Fragment;
import android.support.v4.content.ContextCompat;
import android.support.v4.graphics.drawable.DrawableCompat;
import android.transition.Explode;
import android.transition.Transition;
import android.view.LayoutInflater;
import android.view.MenuItem;
import android.view.View;
import android.view.Window;

import com.androprogrammer.tutorials.R;
import com.androprogrammer.tutorials.activities.Baseactivity;
import com.androprogrammer.tutorials.fragments.FragmentOne;
import com.androprogrammer.tutorials.fragments.FragmentThree;
import com.androprogrammer.tutorials.fragments.FragmentTwo;
import com.androprogrammer.tutorials.util.Common;

import butterknife.Bind;
import butterknife.ButterKnife;


public class BottomBarDemo extends Baseactivity {

 @Bind(R.id.bottom_navigation)
 BottomNavigationView bottomNavigation;

 private View viewLayout;

 private static final String TAG = "BottomBarDemo";

 private int[] bottomBarColors;

 @Override
 protected void onCreate(Bundle savedInstanceState) {

  if (Build.VERSION.SDK_INT >= Build.VERSION_CODES.LOLLIPOP) {
   getWindow().requestFeature(Window.FEATURE_CONTENT_TRANSITIONS);

   //set the transition
   Transition ts = new Explode();
   ts.setDuration(5000);
   getWindow().setEnterTransition(ts);
   getWindow().setExitTransition(ts);
  }

  super.onCreate(savedInstanceState);

  setReference();

  setSimpleToolbar(true);
  setToolbarElevation(getResources().getDimension(R.dimen.elevation_normal));

  setToolbarSubTittle(this.getClass().getSimpleName());

  getSupportActionBar().setDisplayHomeAsUpEnabled(true);

  int themeColor = Common.getThemeColor(this, R.attr.colorPrimary);

  bottomBarColors = new int[]{
    themeColor,
    R.color.color_skype1,
    R.color.color_blogger,
    R.color.color_gPlus,
    R.color.color_whatsApp
  };

  // For the first time setup
  changeBottomBarColor(bottomNavigation, 0);
  changeFragment(0);

  bottomNavigation.setOnNavigationItemSelectedListener(
    new BottomNavigationView.OnNavigationItemSelectedListener() {
     @Override
     public boolean onNavigationItemSelected(@NonNull MenuItem item) {
      switch (item.getItemId()) {
       case R.id.action_favorites:
        changeBottomBarColor(bottomNavigation, 0);
        changeFragment(0);
        break;
       case R.id.action_schedules:
        changeBottomBarColor(bottomNavigation, 1);
        changeFragment(1);
        break;
       case R.id.action_music:
        changeBottomBarColor(bottomNavigation, 2);
        changeFragment(2);
        break;
       case R.id.action_music1:
        changeBottomBarColor(bottomNavigation, 3);
        changeFragment(3);
        break;
       case R.id.action_favorites1:
        changeBottomBarColor(bottomNavigation, 4);
        changeFragment(4);
        break;
      }
      return true;
     }
    });
 }

 @Override
 public void setReference() {
  viewLayout = LayoutInflater.from(this).inflate(R.layout.activity_bottombar_demo, container);

  ButterKnife.bind(this, viewLayout);
 }

 @Override
 public boolean onOptionsItemSelected(MenuItem item) {
  // Handle action bar item clicks here. The action bar will
  // automatically handle clicks on the Home/Up button, so long
  // as you specify a parent activity in AndroidManifest.xml.
  switch (item.getItemId()) {
   // Respond to the action bar's Up/Home button
   case android.R.id.home:
    finish();
    overridePendingTransition(0, R.anim.activity_close_scale);
    break;
  }

  return super.onOptionsItemSelected(item);
 }


 /**
  * To change bottom bar color on the basis of index
  * @param bottomNavigationView bottom bar object
  * @param index menu index
  */
 private void changeBottomBarColor(BottomNavigationView bottomNavigationView, int index) {
  if (bottomBarColors != null) {
   int colorCode = 0;

   if (index == 0) {
    colorCode = bottomBarColors[index];
   } else {
    colorCode = ContextCompat.getColor(BottomBarDemo.this, bottomBarColors[index]);
   }

   DrawableCompat.setTint(ContextCompat.getDrawable(BottomBarDemo.this,
     R.drawable.drawable_bottombar_color),
     colorCode);

   bottomNavigationView.setItemBackgroundResource(R.drawable.drawable_bottombar_color);

   if (android.os.Build.VERSION.SDK_INT >= Build.VERSION_CODES.LOLLIPOP) {
    // If you want to change status bar color
    //getWindow().setStatusBarColor(ContextCompat.getColor(BottomBarDemo.this, colorCode));

    // If you want to change bottom device navigation key background color
    getWindow().setNavigationBarColor(colorCode);
   }
  }
 }

 /**
  * To load fragments for sample
  * @param position menu index
  */
 private void changeFragment(int position) {

  Fragment newFragment = null;

  if (position == 0) {
   newFragment = new FragmentOne();
  } else if (position % 2 != 0) {
   newFragment = new FragmentTwo();
  } else {
   newFragment = new FragmentThree();
  }

  getFragmentManager().beginTransaction().replace(
    R.id.fragmentContainer, newFragment)
    .commit();
 }
}


That's it from my side. now run the app and see the result. if you have any query or suggestion please let me know in below comment box.

keep coding... :)

Source code
Runtime/Dynamically Change Android Application Theme

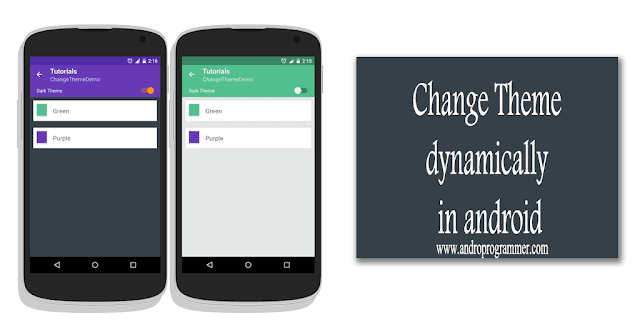
Before android lollipop most of the apps provides only two or three themes to change at run time because they have already bundled image object for that theme color. I mean images and all selector color are defined and drawable already created with all theme colors because there is no primary color and color accent attribute that allow you to change color dynamically before lollipop. In Lollipop they have add selector that change all objects like edit text and switch with the theme color and that's very cool. All object look similar and contrasting to your theme.

So how the app developer change themes run time ?
How to change full app theme run time?

Well for answer of above questions go through full tutorial and you will learn how application default theme changed with newly selected color at run time.

androprogrammer.com


Steps

Step - 1
Create activity where user can select theme color. in this tutorial it is ChangeThemeDemo. I have taken only two colors but you can add as many as you want. It is really lengthy process but if you go step by step it will be so much easy for you. Now create theme.xml in values folder where you will define all themes that you want to implement. And user can change theme from it run time.

values/themes.xml

<?xml version="1.0" encoding="utf-8"?>
<resources>

    <style name="AppTheme.Green" parent="Theme.AppCompat.Light">
        <item name="colorPrimary">@color/primary_green</item>
        <item name="colorPrimaryDark">@color/primary_dark_green</item>
        <item name="colorAccent">@color/accent_green</item>
        <item name="colorControlHighlight">@color/primary_green</item>
        <item name="android:textColorPrimary">@color/primary_text</item>
        <item name="android:textColorSecondary">@color/secondary_text</item>
    </style>

    <style name="AppTheme.Purple" parent="Theme.AppCompat.Light">
        <item name="colorPrimary">@color/primary_purple</item>
        <item name="colorPrimaryDark">@color/primary_dark_purple</item>
        <item name="colorAccent">@color/accent_purple</item>
        <item name="colorControlHighlight">@color/primary_purple</item>
        <item name="android:textColorPrimary">@color/primary_text</item>
        <item name="android:textColorSecondary">@color/secondary_text</item>
    </style>

</resources>

values/color.xml

<?xml version="1.0" encoding="utf-8"?>
<resources>
    <color name="primary_green">#52bf90</color>
    <color name="primary_dark_green">#398564</color>
    <color name="accent_green">#FF4081</color>
    <color name="activity_bg">#e4e5e5</color>
    <color name="primary_purple">#673AB7</color>
    <color name="primary_dark_purple">#512DA8</color>
    <color name="primary_light">#D1C4E9</color>
    <color name="accent_purple">#FF9800</color>
    <color name="primary_text">#212121</color>
    <color name="secondary_text">#727272</color>
    <color name="icons">#FFFFFF</color>
    <color name="divider">#B6B6B6</color>
    <color name="activity_bg_black">#374046</color>
</resources>

Ok, now your basic theme is set. i have created themes.xml file for only declaring base of theme. You can create your hole theme over here as i have created in styles.xml. check out below code for different themes i have created light and dark and both version of my theme in it.

values/styles.xml


<resources>

    <style name="AppTheme.Base.Green" parent="AppTheme.Green">
        <item name="drawerArrowStyle">@style/DrawerArrowStyle</item>
        <item name="windowActionModeOverlay">true</item>
        <item name="windowActionBarOverlay">true</item>
        <item name="android:windowActionBarOverlay">true</item>
        <item name="android:windowBackground">@color/activity_bg</item>
        <item name="windowActionBar">false</item>
        <item name="windowNoTitle">true</item>
    </style>

    <style name="AppTheme.Base.Green.Dark" parent="AppTheme.Green">
        <item name="drawerArrowStyle">@style/DrawerArrowStyle</item>
        <item name="windowActionModeOverlay">true</item>
        <item name="windowActionBarOverlay">true</item>
        <item name="android:windowActionBarOverlay">true</item>
        <item name="android:windowBackground">@color/activity_bg_black</item>
        <item name="windowActionBar">false</item>
        <item name="windowNoTitle">true</item>
    </style>

    <style name="AppTheme.Base.Purple" parent="AppTheme.Purple">
        <item name="drawerArrowStyle">@style/DrawerArrowStyle</item>
        <item name="windowActionModeOverlay">true</item>
        <item name="windowActionBarOverlay">true</item>
        <item name="android:windowActionBarOverlay">true</item>
        <item name="android:windowBackground">@color/activity_bg</item>
        <item name="windowActionBar">false</item>
        <item name="windowNoTitle">true</item>
    </style>

    <style name="AppTheme.Base.Purple.Dark" parent="AppTheme.Purple">
        <item name="drawerArrowStyle">@style/DrawerArrowStyle</item>
        <item name="windowActionModeOverlay">true</item>
        <item name="windowActionBarOverlay">true</item>
        <item name="android:windowActionBarOverlay">true</item>
        <item name="android:windowBackground">@color/activity_bg_black</item>
        <item name="windowActionBar">false</item>
        <item name="windowNoTitle">true</item>
    </style>

    <!-- Base application themes. -->
    <style name="ThemeApp.Green" parent="AppTheme.Base.Green"/>
    <style name="ThemeApp.Green.Dark" parent="AppTheme.Base.Green.Dark"/>
    <style name="ThemeApp.Purple" parent="AppTheme.Base.Purple"/>
    <style name="ThemeApp.Purple.Dark" parent="AppTheme.Base.Purple.Dark"/>


    <style name="DrawerArrowStyle" parent="Widget.AppCompat.DrawerArrowToggle">
        <item name="spinBars">true</item>
        <item name="color">@android:color/white</item>
    </style>

</resources>


Step - 2
In step - 1 we have set all things for themes. now in this step i am going to create layout for theme chooser. you can create as you want but for basic setup you can put below code into your activity. it will allow user to select weather they want to apply light or dark theme. i have directly given values for text and padding and margin but for this tutorial only. it is good practice that you declare it in strings.xml and dimen.xml and then apply here. so it will be reusable.

layout/activity_changetheme_demo.xml

<RelativeLayout xmlns:android="http://schemas.android.com/apk/res/android"
    xmlns:tools="http://schemas.android.com/tools"
    android:layout_width="match_parent"
    android:layout_height="match_parent"
    android:paddingTop="?attr/actionBarSize"
    tools:context="com.androprogrammer.tutorials.samples.ChangeThemeDemo">

    <LinearLayout
        android:id="@+id/layout_header"
        android:layout_width="match_parent"
        android:layout_height="wrap_content"
        android:orientation="horizontal"
        android:background="?attr/colorPrimary">


        <android.support.v7.widget.SwitchCompat
            android:id="@+id/switch_darkTheme"
            android:layout_width="match_parent"
            android:layout_height="wrap_content"
            android:padding="10dip"
            android:layout_marginLeft="10dip"
            android:layout_marginRight="5dip"
            android:textColor="@android:color/white"
            android:text="Dark Theme"
            tools:text="Dark Theme"/>

    </LinearLayout>

    <LinearLayout
        android:layout_below="@id/layout_header"
        android:layout_width="match_parent"
        android:layout_height="wrap_content"
        android:layout_margin="10dip"
        android:padding="10dip"
        android:background="@android:color/white"
        android:id="@+id/Layout_green">

        <LinearLayout
            android:layout_width="30dip"
            android:layout_height="35dip"
            android:gravity="center"
            android:clickable="false"
            android:elevation="5dip"
            android:background="@color/primary_green"/>

        <TextView
            android:layout_width="wrap_content"
            android:layout_height="wrap_content"
            android:text="Green"
            android:gravity="center"
            android:clickable="false"
            android:textAppearance="?android:attr/textAppearanceMedium"
            android:padding="8dip"
            android:layout_marginLeft="10dip"/>

    </LinearLayout>

    <LinearLayout
        android:layout_width="match_parent"
        android:layout_height="wrap_content"
        android:layout_margin="10dip"
        android:padding="10dip"
        android:layout_below="@id/Layout_green"
        android:background="@android:color/white"
        android:id="@+id/Layout_purple">

        <LinearLayout
            android:layout_width="30dip"
            android:layout_height="35dip"
            android:gravity="center"
            android:clickable="false"
            android:elevation="5dip"
            android:background="@color/primary_purple"/>

        <TextView
            android:layout_width="wrap_content"
            android:layout_height="wrap_content"
            android:text="Purple"
            android:gravity="center"
            android:clickable="false"
            android:textAppearance="?android:attr/textAppearanceMedium"
            android:padding="8dip"
            android:layout_marginLeft="10dip"/>

    </LinearLayout>

</RelativeLayout>


Step - 3
Now to change theme in overall screen in your application you have to put below code in your Base or Main Activity so when ever you start app your your new themes gets apply for whole app. in my case i have BaseActivty which i am extending in all other activities so if i put that code in that activity my whole app themes get changed. MainController is application class in my app you can find code here. you have to put below code before calling super.onCreate(savedInstanceState); because setTheme Method will change theme through out the app.

if (!MainController.preferenceGetString("AppliedTheme","").equals(""))
        {
            if (MainController.preferenceGetString("AppliedTheme","").equals("Green"))
            {
                setTheme(R.style.ThemeApp_Green);
            }
            else if (MainController.preferenceGetString("AppliedTheme","").equals("Green_Dark"))
            {
                setTheme(R.style.ThemeApp_Green_Dark);
            }
            else if (MainController.preferenceGetString("AppliedTheme","").equals("Purple_Dark"))
            {
                setTheme(R.style.ThemeApp_Purple_Dark);
            }
            else if (MainController.preferenceGetString("AppliedTheme","").equals("Purple"))
            {
                setTheme(R.style.ThemeApp_Purple);
            }
        }
        else
        {
            setTheme(R.style.ThemeApp_Green);
        }

As i have already told, you don't have to use strings directly you have to define in strings.xml so if you want to change some thing you have to change it at only one place.


Step - 4
Well now all set, now put below code in Java class in this tutorial it is ChangeThemeDemo.java. where you have to change preference on the basis of user selection. which theme is selected by user and weather light version or dark.

samples/ChangeThemeDemo.java

package com.androprogrammer.tutorials.samples;


import android.content.Intent;
import android.os.Build;
import android.os.Bundle;
import android.support.v4.app.TaskStackBuilder;
import android.support.v7.widget.SwitchCompat;
import android.transition.Explode;
import android.transition.Transition;
import android.view.LayoutInflater;
import android.view.MenuItem;
import android.view.View;
import android.view.Window;
import android.widget.CompoundButton;
import android.widget.LinearLayout;

import com.androprogrammer.tutorials.MainController;
import com.androprogrammer.tutorials.R;
import com.androprogrammer.tutorials.activities.Baseactivity;
import com.androprogrammer.tutorials.activities.Listactivity;


/**
 * Created by Wasim on 15-08-2015.
 */
public class ChangeThemeDemo extends Baseactivity implements View.OnClickListener{

    protected View view;
    private LinearLayout layout_green, layout_purple;
    private SwitchCompat switch_dark;
    private boolean isDarkTheme;

    @Override
    protected void onCreate(Bundle savedInstanceState) {
        if(android.os.Build.VERSION.SDK_INT >= Build.VERSION_CODES.LOLLIPOP)
        {
            getWindow().requestFeature(Window.FEATURE_CONTENT_TRANSITIONS);

            //set the transition
            Transition ts = new Explode();
            ts.setDuration(5000);
            getWindow().setEnterTransition(ts);
            getWindow().setExitTransition(ts);
        }

        super.onCreate(savedInstanceState);

        setReference();

        setToolbarElevation(0);

        setToolbarSubTittle(this.getClass().getSimpleName());

        getSupportActionBar().setDisplayHomeAsUpEnabled(true);
    }

    @Override
    public void setReference() {
        view = LayoutInflater.from(this).inflate(R.layout.activity_changetheme_demo,container);

        switch_dark = (SwitchCompat) view.findViewById(R.id.switch_darkTheme);
        layout_green = (LinearLayout) view.findViewById(R.id.Layout_green);
        layout_purple = (LinearLayout) view.findViewById(R.id.Layout_purple);

        switch_dark.setOnCheckedChangeListener(new CompoundButton.OnCheckedChangeListener() {
            @Override
            public void onCheckedChanged(CompoundButton buttonView, boolean isChecked) {

                if (isChecked)
                {
                    isDarkTheme = true;
                    MainController.preferencePutBoolean("DarkTheme", true);
                }
                else {
                    isDarkTheme = false;
                    MainController.preferencePutBoolean("DarkTheme", false);
                }
            }
        });

        if (MainController.preferenceGetBoolean("DarkTheme", false))
        {
            switch_dark.setChecked(true);
        }

        layout_green.setOnClickListener(this);
        layout_purple.setOnClickListener(this);
    }


    @Override
    public boolean onOptionsItemSelected(MenuItem item) {
        // Handle action bar item clicks here. The action bar will
        // automatically handle clicks on the Home/Up button, so long
        // as you specify a parent activity in AndroidManifest.xml.
        switch (item.getItemId()) {
            // Respond to the action bar's Up/Home button
            case android.R.id.home:
                finish();
                break;
        }

        return super.onOptionsItemSelected(item);
    }

    @Override
    public void onClick(View v) {

        switch (v.getId())
        {
            case R.id.Layout_green:
                if (isDarkTheme)
                    MainController.preferencePutString("AppliedTheme", "Green_Dark");
                else
                    MainController.preferencePutString("AppliedTheme", "Green");

                TaskStackBuilder.create(this)
                        .addNextIntent(new Intent(this, Listactivity.class))
                        .addNextIntent(getIntent())
                        .startActivities();
                break;

            case R.id.Layout_purple:

                if (isDarkTheme)
                    MainController.preferencePutString("AppliedTheme", "Purple_Dark");
                else
                    MainController.preferencePutString("AppliedTheme", "Purple");

                TaskStackBuilder.create(this)
                        .addNextIntent(new Intent(this, Listactivity.class))
                        .addNextIntent(getIntent())
                        .startActivities();
                break;
        }

    }
}


After changing theme you have to restart your activity. you also have to change themes in previous screens also. because they are already opened and in Activity stacktrace. So to change theme in it  also i have created TaskStackBuilder. which allow us to recreate Activity stack trace. in my case i have given only two intents but you have to pass activity hierarchy so user don't know that whole app is restarted.

TaskStackBuilder.create(this)
                        .addNextIntent(new Intent(this, Listactivity.class))
                        .addNextIntent(getIntent())
                        .startActivities();

That's it from my side. now run the app and see the result. if you have any query or suggestion please let me know in below comment box.

keep coding...

Source code

View Pager With Circular Indicator (without any library)

There are number of libraries available to create circular indicator for view pager. But i think you don't require that all heavy weight libraries. They all filled with so much congested and non used code in it. It may happen you may come across some odd issue with those libs. So to save your time and even with easy to understand code i have written this tutorial. Go through full tutorial and you find how easy it is.

I have created View pager for introduction of the application (Current trend of application start screen almost in all Google apps). But you can use it as per your requirement.

viewpager demo


Steps

Step -1
Create activity (welcome screen) which holds pager to display images and give proper name to it. In this tutorial it is ViewPagerDemo Activity. now put below code inside into xml file (layout file).

activity_viewpager_demo.xml

<RelativeLayout xmlns:android="http://schemas.android.com/apk/res/android"
    xmlns:tools="http://schemas.android.com/tools"
    android:layout_width="match_parent"
    android:layout_height="match_parent"
    android:fitsSystemWindows="true"
    tools:context="com.androprogrammer.tutorials.samples.ViewPagerDemo">

    <android.support.v4.view.ViewPager
        android:id="@+id/pager_introduction"
        android:layout_width="match_parent"
        android:layout_height="match_parent"
        android:fitsSystemWindows="true"
        tools:listitem="@layout/pager_item" />

    <RelativeLayout
        android:id="@+id/viewPagerIndicator"
        android:layout_width="match_parent"
        android:layout_height="55dp"
        android:layout_alignParentBottom="true"
        android:layout_marginTop="5dp"
        android:gravity="center">

        <LinearLayout
            android:id="@+id/viewPagerCountDots"
            android:layout_width="match_parent"
            android:layout_height="match_parent"
            android:layout_centerHorizontal="true"
            android:gravity="center"
            android:orientation="horizontal" />

        <ImageButton
            android:id="@+id/btn_next"
            android:layout_width="42dip"
            android:layout_height="42dip"
            android:layout_alignParentRight="true"
            android:layout_marginRight="15dip"
            android:background="@drawable/btn_round_semitransperant"
            android:src="@mipmap/ic_navigation_arrow_forward" />

        <ImageButton
            android:id="@+id/btn_finish"
            android:layout_width="42dip"
            android:layout_height="42dip"
            android:layout_alignParentRight="true"
            android:layout_marginRight="15dip"
            android:background="@drawable/btn_round_semitransperant"
            android:contentDescription="Let's start"
            android:src="@mipmap/ic_navigation_check"
            android:visibility="gone" />

    </RelativeLayout>

</RelativeLayout>


Step - 2
Above code will show error but don't worry it is for drawable files. so below are drawable files put the code in appropriate file and your layout is set.

pager_item.xml

<?xml version="1.0" encoding="utf-8"?>
<LinearLayout xmlns:android="http://schemas.android.com/apk/res/android"
    xmlns:tools="http://schemas.android.com/tools"
    android:orientation="vertical"
    android:layout_width="match_parent"
    android:fitsSystemWindows="true"
    android:layout_height="match_parent">

    <ImageView
        android:layout_width="match_parent"
        android:layout_height="match_parent"
        tools:src="@mipmap/abc1"
        android:id="@+id/img_pager_item"
        android:scaleType="fitXY"
        android:adjustViewBounds="true"
        android:clickable="false"/>

</LinearLayout>


drawable/selecteditem_dot.xml

<?xml version="1.0" encoding="utf-8"?>
<shape xmlns:android="http://schemas.android.com/apk/res/android"
    android:shape="oval" android:useLevel="true"
    android:dither="true">

    <size android:height="12dip" android:width="12dip"/>

    <solid android:color="@color/primary"/>
</shape>


drawable/nonselecteditem_dot.xml

<?xml version="1.0" encoding="utf-8"?>
<shape xmlns:android="http://schemas.android.com/apk/res/android"
    android:shape="oval" android:useLevel="true"
    android:dither="true">

    <size android:height="6dip" android:width="6dip"/>

    <solid android:color="@color/activity_bg"/>
</shape>


Step - 3
For View pager, layout part is done. you can find sample images from here. now let's move to code part where i have created circular dots on the basis of data size. So if you have let say 10 images it will create 10 dots with first one as selected by default. put the code in to activity and make changes as per your project implementation.

ViewPagerDemo.java

package com.androprogrammer.tutorials.samples;

import android.os.Bundle;
import android.support.v4.view.ViewPager;
import android.view.LayoutInflater;
import android.view.MenuItem;
import android.view.View;
import android.view.Window;
import android.view.WindowManager;
import android.widget.ImageButton;
import android.widget.ImageView;
import android.widget.LinearLayout;

import com.androprogrammer.tutorials.R;
import com.androprogrammer.tutorials.activities.Baseactivity;
import com.androprogrammer.tutorials.adapters.ViewPagerAdapter;

public class ViewPagerDemo extends Baseactivity implements ViewPager.OnPageChangeListener, View.OnClickListener{

    protected View view;
    private ImageButton btnNext, btnFinish;
    private ViewPager intro_images;
    private LinearLayout pager_indicator;
    private int dotsCount;
    private ImageView[] dots;
    private ViewPagerAdapter mAdapter;

    private int[] mImageResources = {
            R.mipmap.abc1,
            R.mipmap.abc2,
            R.mipmap.abc3,
            R.mipmap.abc4,
            R.mipmap.abc5
    };

    @Override
    protected void onCreate(Bundle savedInstanceState)
    {
        // To make activity full screen.
        requestWindowFeature(Window.FEATURE_NO_TITLE);
        getWindow().setFlags(WindowManager.LayoutParams.FLAG_FULLSCREEN,
                WindowManager.LayoutParams.FLAG_FULLSCREEN);

        super.onCreate(savedInstanceState);

        setReference();

        toolbar.setVisibility(View.GONE);

    }

    @Override
    public void setReference() {
        view = LayoutInflater.from(this).inflate(R.layout.activity_viewpager_demo,container);

        intro_images = (ViewPager) view.findViewById(R.id.pager_introduction);
        btnNext = (ImageButton) view.findViewById(R.id.btn_next);
        btnFinish = (ImageButton) view.findViewById(R.id.btn_finish);

        pager_indicator = (LinearLayout) view.findViewById(R.id.viewPagerCountDots);

        btnNext.setOnClickListener(this);
        btnFinish.setOnClickListener(this);

        mAdapter = new ViewPagerAdapter(ViewPagerDemo.this, mImageResources);
        intro_images.setAdapter(mAdapter);
        intro_images.setCurrentItem(0);
        intro_images.setOnPageChangeListener(this);
        setUiPageViewController();
    }

    private void setUiPageViewController() {

        dotsCount = mAdapter.getCount();
        dots = new ImageView[dotsCount];

        for (int i = 0; i < dotsCount; i++) {
            dots[i] = new ImageView(this);
            dots[i].setImageDrawable(getResources().getDrawable(R.drawable.nonselecteditem_dot));

            LinearLayout.LayoutParams params = new LinearLayout.LayoutParams(
                    LinearLayout.LayoutParams.WRAP_CONTENT,
                    LinearLayout.LayoutParams.WRAP_CONTENT
            );

            params.setMargins(4, 0, 4, 0);

            pager_indicator.addView(dots[i], params);
        }

        dots[0].setImageDrawable(getResources().getDrawable(R.drawable.selecteditem_dot));
    }


    @Override
    public void onClick(View v) {
        switch (v.getId()) {
            case R.id.btn_next:
                intro_images.setCurrentItem((intro_images.getCurrentItem() < dotsCount)
                        ? intro_images.getCurrentItem() + 1 : 0);
                break;

            case R.id.btn_finish:
                finish();
                break;
        }
    }

    @Override
    public void onPageScrolled(int position, float positionOffset, int positionOffsetPixels) {

    }

    @Override
    public void onPageSelected(int position) {
        for (int i = 0; i < dotsCount; i++) {
            dots[i].setImageDrawable(getResources().getDrawable(R.drawable.nonselecteditem_dot));
        }

        dots[position].setImageDrawable(getResources().getDrawable(R.drawable.selecteditem_dot));

        if (position + 1 == dotsCount) {
            btnNext.setVisibility(View.GONE);
            btnFinish.setVisibility(View.VISIBLE);
        } else {
            btnNext.setVisibility(View.VISIBLE);
            btnFinish.setVisibility(View.GONE);
        }
    }

    @Override
    public void onPageScrollStateChanged(int state) {

    }
}


This is code for view pager adapter.which fills all images into view pager and display like gallery.
adapters/ViewPagerAdapter.java

package com.androprogrammer.tutorials.adapters;

import android.content.Context;
import android.support.v4.view.PagerAdapter;
import android.view.LayoutInflater;
import android.view.View;
import android.view.ViewGroup;
import android.widget.ImageView;
import android.widget.LinearLayout;

import com.androprogrammer.tutorials.R;

/**
 * Created by Wasim on 11-06-2015.
 */
public class ViewPagerAdapter extends PagerAdapter {

    private Context mContext;
    private int[] mResources;

    public ViewPagerAdapter(Context mContext, int[] mResources) {
        this.mContext = mContext;
        this.mResources = mResources;
    }

    @Override
    public int getCount() {
        return mResources.length;
    }

    @Override
    public boolean isViewFromObject(View view, Object object) {
        return view == ((LinearLayout) object);
    }

    @Override
    public Object instantiateItem(ViewGroup container, int position) {
        View itemView = LayoutInflater.from(mContext).inflate(R.layout.pager_item, container, false);

        ImageView imageView = (ImageView) itemView.findViewById(R.id.img_pager_item);
        imageView.setImageResource(mResources[position]);

        container.addView(itemView);

        return itemView;
    }

    @Override
    public void destroyItem(ViewGroup container, int position, Object object) {
        container.removeView((LinearLayout) object);
    }
}


That's it from my side. now run the app and see the result. and at the end i am replacing next button with finish button. if you have any query please let me know in below comment box.

Keep coding...

Source code

Material Design: Tabs with Toolbar

Action bar is deprecated in android 5.0 known as Android Lollipop and new toolbar is introduced by Android(Google) developers. Toolbar is also a simple view like others but to enhance UI and UX of apps they have introduced it with some enhancement. In Android 5.0 Tabs are also recreated with some enhancement. because toolbar doesn't support direct tabs like actionbar. In action bar you can add tabs using method called addTab() but with tabs you can't use same method. now you even don't require Tab host or Tab widget to add tabs. so how ?

Well go through full tutorial and you can implement nice tabs like google play, google music and many other apps have. Tabs are mostly used to display two different views in same page or activity. most of the developer load different fragments in tabs so they can have control over tabs and views associated with it. Tabs can be of two types.

1. Tabs with label
2. Tabs with icons


Steps

Step - 1
Create activity which holds tabs inside view part and give proper name to it. In this tutorial it is TabViewDemo Activity. To create tabs first we have to create SlidingTabLayout and SlidingTabStripe custom view. So put below both class code in your project.
Get it from github

SlidingTabLayout.java
SlidingTabStripe.java

Step - 2 a)
Now put below code in activity which you have created in Step - 1. this activity is Demo activity which will display tabs with labels(type -1). Below you can find layout and class file code put the code inside your project.

activity_tabview_demo.xml

<RelativeLayout xmlns:android="http://schemas.android.com/apk/res/android"
    xmlns:tools="http://schemas.android.com/tools"
    android:layout_width="match_parent"
    android:layout_height="match_parent"
    android:paddingTop="?attr/actionBarSize"
    tools:context="com.androprogrammer.tutorials.samples.TabViewDemo">

    <LinearLayout
        android:layout_width="match_parent"
        android:layout_height="match_parent"
        android:orientation="vertical">

        <com.androprogrammer.tutorials.customviews.SlidingTabLayout
            android:layout_width="match_parent"
            android:layout_height="wrap_content"
            android:id="@+id/tab_layout_header"
            android:elevation="8dp"/>

        <android.support.v4.view.ViewPager
            android:id="@+id/tab_layout_container"
            android:layout_width="match_parent"
            android:layout_height="0px"
            android:layout_weight="1"
            android:background="@color/activity_bg" />

    </LinearLayout>

</RelativeLayout>


TabViewDemo.java

package com.androprogrammer.tutorials.samples;

import android.app.ActionBar;

import android.app.FragmentTransaction;
import android.graphics.Color;
import android.os.Build;
import android.support.v4.app.Fragment;
import android.os.Bundle;
import android.transition.Slide;
import android.transition.Transition;
import android.view.LayoutInflater;
import android.view.MenuItem;
import android.view.View;


import com.androprogrammer.tutorials.R;
import com.androprogrammer.tutorials.activities.Baseactivity;
import com.androprogrammer.tutorials.adapters.TabFragmentAdapter;
import com.androprogrammer.tutorials.customviews.SlidingTabLayout;
import com.androprogrammer.tutorials.fragments.FragmentOne;
import com.androprogrammer.tutorials.fragments.FragmentThree;
import com.androprogrammer.tutorials.fragments.FragmentTwo;

import java.util.ArrayList;

public class TabViewDemo extends Baseactivity implements ActionBar.TabListener {

    protected View view;
    protected SlidingTabLayout tabs_header;
    protected android.support.v4.view.ViewPager mPager;
    protected ArrayList<fragment> fragments;
    protected TabFragmentAdapter mAdapter;

    @Override
    protected void onCreate(Bundle savedInstanceState)
    {
        if(android.os.Build.VERSION.SDK_INT >= Build.VERSION_CODES.LOLLIPOP)
        {
            getWindow().requestFeature(android.view.Window.FEATURE_CONTENT_TRANSITIONS);

            //set the transition
            Transition ts = new Slide();
            ts.setDuration(3000);
            getWindow().setEnterTransition(ts);
            getWindow().setExitTransition(ts);

        }

        super.onCreate(savedInstanceState);

        setReference();

        setToolbarSubTittle(this.getClass().getSimpleName());

        setToolbarElevation(0);

        getSupportActionBar().setDisplayHomeAsUpEnabled(true);

        fragments.add(new FragmentOne());
        fragments.add(new FragmentTwo());
        fragments.add(new FragmentThree());

        String[] titles = {"One", "Two", "Three"};

        mAdapter = new TabFragmentAdapter(getSupportFragmentManager(), fragments, titles);

        mPager.setAdapter(mAdapter);

        tabs_header.setBackgroundColor(getResources().getColor(R.color.primary));
        tabs_header.setTitleColor(Color.WHITE);
        tabs_header.setFittingChildren(true);
        tabs_header.setTabType(SlidingTabLayout.TabType.TEXT);
        tabs_header.setViewPager(mPager);
    }

    @Override
    public void setReference() {

        view = LayoutInflater.from(this).inflate(R.layout.activity_tabview_demo,container);

        tabs_header = (SlidingTabLayout) view.findViewById(R.id.tab_layout_header);
        mPager = (android.support.v4.view.ViewPager) view.findViewById(R.id.tab_layout_container);
        fragments = new ArrayList<fragment>();

        SetTabSelector();
    }

    @Override
    public boolean onOptionsItemSelected(MenuItem item) {
        // Handle action bar item clicks here. The action bar will
        // automatically handle clicks on the Home/Up button, so long
        // as you specify a parent activity in AndroidManifest.xml.
        switch (item.getItemId()) {
            // Respond to the action bar's Up/Home button
            case android.R.id.home:
                finish();
                break;
        }

        return super.onOptionsItemSelected(item);
    }

    private void SetTabSelector()
    {
        tabs_header.setCustomTabColorizer(new SlidingTabLayout.TabColorizer() {
            @Override
            public int getIndicatorColor(int position)
            {
                int ColorId = 0;

                switch (position)
                {
                    case 0:
                        ColorId = Color.WHITE;
                        break;

                    case 1:
                        ColorId = Color.MAGENTA;
                        break;
                    case 2:
                        ColorId = Color.RED;
                        break;
                }

                return ColorId;

            }

            @Override
            public int getDividerColor(int position) {
                return 0;
            }
        });

    }

    @Override
    public void onTabSelected(ActionBar.Tab tab, FragmentTransaction ft) {
        mPager.setCurrentItem(tab.getPosition());
    }

    @Override
    public void onTabUnselected(ActionBar.Tab tab, FragmentTransaction ft) {

    }

    @Override
    public void onTabReselected(ActionBar.Tab tab, FragmentTransaction ft) {

    }
}


Step - 2 b)
This is second sub part of tutorial. if you want to create tabs with icons(type -2) then put below code for tabs with simple text put above code in your activity. to create tabs with icon you have to give name to images like this, ic_one, ic_two etc. because i have fetched images from drawable using tab title. check below code.

private int getResourceIdByName(String resourceName) {
        // get images from mipmap folder
        return getResources().getIdentifier(resourceName, "mipmap", getContext().getPackageName());
    }


if your project consist old drawable pattern then replace mipmap with drawable in SlidingTabLayout file.

ImageTabViewDemo.java

package com.androprogrammer.tutorials.samples;

import android.app.ActionBar;
import android.app.FragmentTransaction;
import android.graphics.Color;
import android.os.Build;
import android.os.Bundle;
import android.support.v4.app.Fragment;
import android.transition.Slide;
import android.transition.Transition;
import android.view.LayoutInflater;
import android.view.MenuItem;
import android.view.View;

import com.androprogrammer.tutorials.R;
import com.androprogrammer.tutorials.activities.Baseactivity;
import com.androprogrammer.tutorials.adapters.TabFragmentAdapter;
import com.androprogrammer.tutorials.customviews.SlidingTabLayout;
import com.androprogrammer.tutorials.fragments.FragmentOne;
import com.androprogrammer.tutorials.fragments.FragmentThree;
import com.androprogrammer.tutorials.fragments.FragmentTwo;

import java.util.ArrayList;

public class ImageTabViewDemo extends Baseactivity implements ActionBar.TabListener {

    protected View view;
    protected SlidingTabLayout tabs_header;
    protected android.support.v4.view.ViewPager mPager;
    protected ArrayList<fragment> fragments;
    protected TabFragmentAdapter mAdapter;

    @Override
    protected void onCreate(Bundle savedInstanceState)
    {
        if(Build.VERSION.SDK_INT >= Build.VERSION_CODES.LOLLIPOP)
        {
            getWindow().requestFeature(android.view.Window.FEATURE_CONTENT_TRANSITIONS);

            //set the transition
            Transition ts = new Slide();
            ts.setDuration(3000);
            getWindow().setEnterTransition(ts);
            getWindow().setExitTransition(ts);


        }

        super.onCreate(savedInstanceState);

        setReference();

        setToolbarSubTittle(this.getClass().getSimpleName());

        setToolbarElevation(0);

        getSupportActionBar().setDisplayHomeAsUpEnabled(true);

        fragments.add(new FragmentOne());
        fragments.add(new FragmentTwo());
        fragments.add(new FragmentThree());

        String[] titles = {"one", "two", "three"};

        mAdapter = new TabFragmentAdapter(getSupportFragmentManager(), fragments, titles);

        mPager.setAdapter(mAdapter);

        tabs_header.setBackgroundColor(getResources().getColor(R.color.primary));
        tabs_header.setTitleColor(Color.WHITE);
        tabs_header.setFittingChildren(true);
        tabs_header.setTabType(SlidingTabLayout.TabType.ICON);
        tabs_header.setViewPager(mPager);
    }

    @Override
    public void setReference() {

        view = LayoutInflater.from(this).inflate(R.layout.activity_tabview_demo,container);

        tabs_header = (SlidingTabLayout) view.findViewById(R.id.tab_layout_header);
        mPager = (android.support.v4.view.ViewPager) view.findViewById(R.id.tab_layout_container);
        fragments = new ArrayList<fragment>();

        SetTabSelector();
    }

    @Override
    public boolean onOptionsItemSelected(MenuItem item) {
        // Handle action bar item clicks here. The action bar will
        // automatically handle clicks on the Home/Up button, so long
        // as you specify a parent activity in AndroidManifest.xml.
        switch (item.getItemId()) {
            // Respond to the action bar's Up/Home button
            case android.R.id.home:
                finish();
                break;
        }

        return super.onOptionsItemSelected(item);
    }

    private void SetTabSelector()
    {
        tabs_header.setCustomTabColorizer(new SlidingTabLayout.TabColorizer() {
            @Override
            public int getIndicatorColor(int position)
            {
                int ColorId = 0;

                switch (position)
                {
                    case 0:
                        ColorId = Color.WHITE;
                        break;

                    case 1:
                        ColorId = Color.MAGENTA;
                        break;
                    case 2:
                        ColorId = Color.RED;
                        break;
                }

                return ColorId;

            }

            @Override
            public int getDividerColor(int position) {
                return 0;
            }
        });

    }

    @Override
    public void onTabSelected(ActionBar.Tab tab, FragmentTransaction ft) {
        mPager.setCurrentItem(tab.getPosition());
    }

    @Override
    public void onTabUnselected(ActionBar.Tab tab, FragmentTransaction ft) {

    }

    @Override
    public void onTabReselected(ActionBar.Tab tab, FragmentTransaction ft) {

    }
}


Resources of my project is available at Github so please get images from there. to load three different views i created adapter which extends FragmentPagerAdapter class. below is code of adapter of view pager.

TabFragmentAdapter.java

package com.androprogrammer.tutorials.adapters;

import android.support.v4.app.Fragment;
import android.support.v4.app.FragmentManager;
import android.support.v4.app.FragmentPagerAdapter;

import java.util.ArrayList;

/**
 * Created by Wasim on 28-04-2015.
 */
public class TabFragmentAdapter extends FragmentPagerAdapter {

    private ArrayList<Fragment> fragments;
    private String[] titles;

    public TabFragmentAdapter(FragmentManager fm, ArrayList <Fragment> fragments, String [] title) {
        super(fm);
        this.fragments = fragments;
        this.titles = title;
    }

    @Override
    public Fragment getItem(int position) {
        return fragments.get(position);
    }

    @Override
    public int getCount() {
        return fragments.size();
    }

    @Override
    public int getItemPosition(Object object) {
        return super.getItemPosition(object);
    }

    @Override
    public CharSequence getPageTitle(int position) {
        return titles[position];
    }
}


Step - 3
In this tutorial i have even used three fragments to load on three different tabs.the fragments have no logic or code so i don't put that code here. you can find code from here.

That's it. I hope you its clear to you. now run your app. hope it will work fine. if you have any query
or have problem in code implementation write it in below comment box.

Keep coding...

Navigation Drawer With Transparent Status bar

It is second part of  Let's Start with Material Design Series. In this series i will explain how you can give Material over haul to your existing app or how you can create it with Material design. in first part i have created the main layout of the app so if you want to know about it head over to it. Part -1 is about using Recycler view and Toolbar in Pre - Lollipop device using appcompat v21 library. In this part i am going to explain about navigation drawer. how you can implement navigation drawer as per material design guidelines.This tutorial even includes hamburger animation used in Google apps.

According to android documentation If you have hierarchy of views(More than 3 top-level views) then only you have to implement nav drawer in your app. and all top level views must be displayed in nav drawer for quick jumps to the top-level of your app. As nav drawer can be used from all views of app, you can incorporate or display important lower-level views also. but make sure child view indicate its parent view so user won't get confused.

You can use list view or expandable list view for navigation drawer but make sure for each row you use only one text view. for this tutorial i am going to create nav drawer as you can see in google apps (not the same). but as per Material design guidelines, as guidelines suggest drawer should spans the full height of the screen and the drawer should below the status bar. to span full space we need to customize frame layout. That actually Making DrawerLayout behind the system bars using fitSystemWindows property. one more thing we are using toolbar in place of action bar (that look same as action bar) that's how we will overlapping nav drawer above the action bar. as i am using appcompat library this app will look like same on pre-lollipop android device also.

As per doc the width of the side nav is equal to the width of the screen minus the height of the action bar, or 56dp from the right edge of the screen.
Mobile: Width = screen width - app bar height (No wider than 320dp on phones and 400dp on tablets).

Step -1 : As we have already created project in Part -1 we are directly going to change the main layout of project. so put below code inside Main.xml file. as it consist ScrimInsetsFrameLayout which will give error but don't worry it is customized frame layout. as you go through full tutorial you will get class file for it also. The same is used in Google I/O app. why they have given such name even i can't understand.  you can give name what ever you want. Below xml files are layout for main(content view) and navigation drawer view.
Main.xml

<?xml version="1.0" encoding="utf-8"?>
<android.support.v4.widget.DrawerLayout
    xmlns:android="http://schemas.android.com/apk/res/android"
    xmlns:tools="http://schemas.android.com/tools"
    xmlns:app="http://schemas.android.com/apk/res-auto"
    android:id="@+id/drawer_layout"
    android:layout_width="match_parent"
    android:layout_height="match_parent"
    android:fitsSystemWindows="true"
    tools:context=".MainActivity">

    <!-- Setting this one to true makes the status bar
        to have a non-transparent shitty background -->

    <!--
         As the main content view, the view below consumes the entire
         space available using match_parent in both dimensions.
    -->

    <FrameLayout
        android:layout_width="match_parent"
        android:layout_height="match_parent"
        android:fitsSystemWindows="false">

        <include layout="@layout/actionbarlayout"></include>

        <android.support.v7.widget.RecyclerView
            android:id="@+id/my_recycler_view"
            android:layout_marginTop="?attr/actionBarSize"
            android:layout_marginRight="4dp"
            android:layout_marginLeft="4dp"
            android:elevation="5dp"
            android:layout_width="match_parent"
            android:layout_height="wrap_content" />

        <Button
            android:id="@+id/addButton"
            android:text="+"
            android:textSize="25sp"
            android:textColor="@android:color/white"
            android:textAlignment="center"
            android:layout_marginRight="15dp"
            android:layout_marginBottom="15dp"
            android:background="@drawable/circlebtn"
            android:layout_width="56dp"
            android:layout_height="56dp"
            android:stateListAnimator="@animator/anim"
            android:elevation="4dp"
            style="?android:buttonStyleSmall"
            android:layout_gravity="right|bottom" />
        

    </FrameLayout>

    <com.androprogrammer.test.materialapp1.ScrimInsetsFrameLayout
        android:id="@+id/container"
        android:layout_width="wrap_content"
        android:layout_height="match_parent"
        android:fitsSystemWindows="true"
        android:elevation="8dp"
        android:layout_gravity="start"
        app:insetForeground="#4000">

        <ListView
            android:id="@+id/list_drawer"
            android:layout_width="@dimen/drawer_width"
            android:layout_height="match_parent"
            android:choiceMode="singleChoice"
            android:background="@android:color/white"
            android:fitsSystemWindows="true" />
       

    </com.androprogrammer.test.materialapp1.ScrimInsetsFrameLayout>
</android.support.v4.widget.DrawerLayout>
actionbarlayout.xml
<?xml version="1.0" encoding="utf-8"?>
<android.support.v7.widget.Toolbar
    xmlns:android="http://schemas.android.com/apk/res/android"
    xmlns:app="http://schemas.android.com/apk/res-auto"
    android:minHeight="?attr/actionBarSize"
    android:layout_width="match_parent"
    android:layout_height="wrap_content"
    android:id="@+id/toolbar"
    android:elevation="4dp"
    app:popupTheme="@style/ThemeOverlay.AppCompat.Light"
    android:background="@color/primary"/>

drawerlist_header.xml
<?xml version="1.0" encoding="utf-8"?>
<FrameLayout xmlns:android="http://schemas.android.com/apk/res/android"
    android:layout_width="match_parent"
    android:layout_height="match_parent">

    <ImageView
        android:layout_width="match_parent"
        android:layout_height="160dp"
        android:id="@+id/imageView"
        android:scaleType="centerCrop"
        android:clickable="false"
        android:src="@drawable/headerbg"
        android:layout_gravity="center_horizontal|top" />
</FrameLayout>

Step -2 : Now layouts are set for main view. now we will create style for app so it will look same threw out the app.
values/styles.xml


values/attrs.xml


values/color.xml

    #fe2e2e
    #EFcb2424

values/dimens.xml

    2dp
    4dp
    320dp
    56dp


values/strings.xml


    My Application1
    Settings
    open
    close


values-v21/styles.xml


Step - 3 : Now we will move forward to code section of the app which was also know as dirty or magical section of the app.  put below code in ScrimInsetsFrameLayout classor what ever you named it in xml layout. 
ScrimInsetsFrameLayout.java

package com.androprogrammer.test.materialapp1;

/**
* Copyright 2014 Google Inc.
*
* Licensed under the Apache License, Version 2.0 (the "License");
* you may not use this file except in compliance with the License.
* You may obtain a copy of the License at
*
*     http://www.apache.org/licenses/LICENSE-2.0
*
* Unless required by applicable law or agreed to in writing, software
* distributed under the License is distributed on an "AS IS" BASIS,
* WITHOUT WARRANTIES OR CONDITIONS OF ANY KIND, either express or implied.
* See the License for the specific language governing permissions and
* limitations under the License.
*/

import android.content.Context;
import android.content.res.TypedArray;
import android.graphics.Canvas;
import android.graphics.Rect;
import android.graphics.drawable.Drawable;
import android.support.v4.view.ViewCompat;
import android.util.AttributeSet;
import android.widget.FrameLayout;

/**
 * A layout that draws something in the insets passed to {@link #fitSystemWindows(Rect)}, i.e. the area above UI chrome
 * (status and navigation bars, overlay action bars).
 */
public class ScrimInsetsFrameLayout extends FrameLayout {
    private Drawable mInsetForeground;

    private Rect mInsets;
    private Rect mTempRect = new Rect();
    private OnInsetsCallback mOnInsetsCallback;

    public ScrimInsetsFrameLayout(Context context) {
        super(context);
        init(context, null, 0);
    }

    public ScrimInsetsFrameLayout(Context context, AttributeSet attrs) {
        super(context, attrs);
        init(context, attrs, 0);
    }

    public ScrimInsetsFrameLayout(Context context, AttributeSet attrs, int defStyle) {
        super(context, attrs, defStyle);
        init(context, attrs, defStyle);
    }

    private void init(Context context, AttributeSet attrs, int defStyle) {
        final TypedArray a = context.obtainStyledAttributes(attrs,
                R.styleable.ScrimInsetsView, defStyle, 0);
        if (a == null) {
            return;
        }
        mInsetForeground = a.getDrawable(R.styleable.ScrimInsetsView_insetForeground);
        a.recycle();

        setWillNotDraw(true);
    }

    @Override
    protected boolean fitSystemWindows(Rect insets) {
        mInsets = new Rect(insets);
        setWillNotDraw(mInsetForeground == null);
        ViewCompat.postInvalidateOnAnimation(this);
        if (mOnInsetsCallback != null) {
            mOnInsetsCallback.onInsetsChanged(insets);
        }
        return true; // consume insets
    }

    @Override
    public void draw(Canvas canvas) {
        super.draw(canvas);

        int width = getWidth();
        int height = getHeight();
        if (mInsets != null && mInsetForeground != null) {
            int sc = canvas.save();
            canvas.translate(getScrollX(), getScrollY());

            // Top
            mTempRect.set(0, 0, width, mInsets.top);
            mInsetForeground.setBounds(mTempRect);
            mInsetForeground.draw(canvas);

            // Bottom
            mTempRect.set(0, height - mInsets.bottom, width, height);
            mInsetForeground.setBounds(mTempRect);
            mInsetForeground.draw(canvas);

            // Left
            mTempRect.set(0, mInsets.top, mInsets.left, height - mInsets.bottom);
            mInsetForeground.setBounds(mTempRect);
            mInsetForeground.draw(canvas);

            // Right
            mTempRect.set(width - mInsets.right, mInsets.top, width, height - mInsets.bottom);
            mInsetForeground.setBounds(mTempRect);
            mInsetForeground.draw(canvas);

            canvas.restoreToCount(sc);
        }
    }

    @Override
    protected void onAttachedToWindow() {
        super.onAttachedToWindow();
        if (mInsetForeground != null) {
            mInsetForeground.setCallback(this);
        }
    }

    @Override
    protected void onDetachedFromWindow() {
        super.onDetachedFromWindow();
        if (mInsetForeground != null) {
            mInsetForeground.setCallback(null);
        }
    }

    /**
     * Allows the calling container to specify a callback for custom processing when insets change (i.e. when
     * {@link #fitSystemWindows(Rect)} is called. This is useful for setting padding on UI elements based on
     * UI chrome insets (e.g. a Google Map or a ListView). When using with ListView or GridView, remember to set
     * clipToPadding to false.
     */
    public void setOnInsetsCallback(OnInsetsCallback onInsetsCallback) {
        mOnInsetsCallback = onInsetsCallback;
    }

    public static interface OnInsetsCallback {
        public void onInsetsChanged(Rect insets);
    }
}


It is copyrighted by Google developer so if you copy it please give proper reference to them.
MainActivity.java

package com.androprogrammer.test.materialapp1;

import android.os.Bundle;
import android.support.v7.app.ActionBarActivity;
import android.support.v7.app.ActionBarDrawerToggle;
import android.support.v7.widget.DefaultItemAnimator;
import android.support.v7.widget.LinearLayoutManager;
import android.util.Log;
import android.view.View;
import android.widget.AdapterView;
import android.widget.ArrayAdapter;
import android.widget.Button;
import android.widget.ListView;
import android.widget.Toast;

public class MainActivity extends ActionBarActivity implements ListView.OnItemClickListener
{
    private android.support.v7.widget.RecyclerView mRecyclerView;
    private android.support.v7.widget.RecyclerView.Adapter mAdapter;
    private android.support.v7.widget.RecyclerView.LayoutManager mLayoutManager;
    private android.support.v7.widget.Toolbar toolbar;
    private android.support.v4.widget.DrawerLayout drawerLayout;
    private ActionBarDrawerToggle drawerToggle;
    private ListView leftDrawerList;
    private ArrayAdapter<string> navigationDrawerAdapter;
    private Button fab;
    private String[] leftSliderData = {"Home", "Android", "Sitemap", "About", "Contact Me"};
    protected String[] myDataset = {"facebook", "Google+", "twitter", "Linkdin", "pintrest"};


    @Override
    protected void onCreate(Bundle savedInstanceState) {
        super.onCreate(savedInstanceState);
        setContentView(R.layout.main);

        setRef();

        //Set the custom toolbar
        if (toolbar != null)
        {
            toolbar.setTitle(R.string.app_name);
            setSupportActionBar(toolbar);
        }

        drawerToggle = new ActionBarDrawerToggle(
                this,
                drawerLayout,
                toolbar,
                R.string.open,
                R.string.close
        )

        {
            public void onDrawerClosed(View view)
            {
                Log.d("MainActivity", "OnDrawerClosed");
                super.onDrawerClosed(view);
                invalidateOptionsMenu();
            }

            public void onDrawerOpened(View drawerView)
            {
                Log.d("MainActivity", "OnDrawerOpened");
                super.onDrawerOpened(drawerView);
                invalidateOptionsMenu();
            }
        };

        drawerLayout.setDrawerListener(drawerToggle);

        getSupportActionBar().setDisplayHomeAsUpEnabled(true);

        // use this setting to improve performance if you know that changes
        // in content do not change the layout size of the RecyclerView
        mRecyclerView.setHasFixedSize(true);

        // use a linear layout manager
        mLayoutManager = new LinearLayoutManager(this);
        mRecyclerView.setLayoutManager(mLayoutManager);
        mRecyclerView.setItemAnimator(new DefaultItemAnimator());

        // specify an adapter (see also next example)
        mAdapter = new MyAdapter(myDataset);
        mRecyclerView.setAdapter(mAdapter);

    }

    @Override
    protected void onPostCreate(Bundle savedInstanceState) {
        super.onPostCreate(savedInstanceState);
        drawerToggle.syncState();
    }

    private void setRef()
    {
        mRecyclerView = (android.support.v7.widget.RecyclerView) findViewById(R.id.my_recycler_view);
        fab = (Button) findViewById(R.id.addButton);
        drawerLayout = (android.support.v4.widget.DrawerLayout) findViewById(R.id.drawer_layout);
        drawerLayout.setStatusBarBackground(R.color.primarydark);

        toolbar = (android.support.v7.widget.Toolbar) findViewById(R.id.toolbar);
        leftDrawerList = (ListView) findViewById(R.id.list_drawer);

        View list_header = getLayoutInflater().inflate(R.layout.drawerlist_header, null);
        leftDrawerList.addHeaderView(list_header);
        navigationDrawerAdapter = new ArrayAdapter<string>(MainActivity.this, android.R.layout.simple_expandable_list_item_1, leftSliderData);
        leftDrawerList.setAdapter(navigationDrawerAdapter);
        leftDrawerList.setOnItemClickListener(this);
    }

    @Override
    public void onItemClick(AdapterView parent, View view, int position, long id)
    {
        Toast.makeText(getApplicationContext(), "Clicked on " + leftSliderData[position - 1], Toast.LENGTH_LONG).show();
    }

}


Screen Shots

android navigation drawer android navigation drawer

Step - 4 : Now every thing done but please apply theme in manifest.xml in application tag.
android:theme="@style/AppTheme"
And one more thing is that to run app you need to add libraries in app.gradle file it is in app folder named as build.gradle

dependencies {
    compile fileTree(include: ['*.jar'], dir: 'libs')
    compile 'com.android.support:support-v4:21.0.0'
    compile 'com.android.support:recyclerview-v7:21.0.+'
    compile 'com.android.support:appcompat-v7:21.0.2'


Well that's it from my side now run the app and check how it works. hope you learned from this tutorial if find it useful please hare it with your friends or in circle. if i miss any thing or you have any query please let me know in below comment box.

Keep coding...

Let's Start with Material Design

Material design sampleHave Heard lots of about Android Material design but don't know from where to start, well in this tutorial i will tell you how to create app from scratch with material design. This tutorial is just a beginning of Material design tutorial. so i just keep it simple.


From Kitkat and all older version of android Google has given new overhaul with the Material design in Android 5.0 (Well known as Android Lollipop). with new Card view , Recycler view and some of the new animation it is really user friendly. User will love the animation in this version. So lets start new project with android api -21.

Step - 1 : Create New Android application and give name MainActivity to main activity and same name for layout file.
  • minSdkVersion="21”
  • targetSdkVersion="21"
now put below code in your project main.xml file. you can set layout as you want but for practice purpose you can go with same.
Main.xml


    <android.support.v7.widget.recyclerview android:elevation="5dp" android:id="@+id/my_recycler_view" android:layout_height="match_parent" android:layout_marginleft="4dp" android:layout_marginright="4dp" android:layout_margintop="10dp" android:layout_width="match_parent" android:scrollbars="vertical">
    </android..support.v7.widget.recyclerview>


I have used frame layout. it allows to put component(widget/view) at any specific position. To create round button there are number of ways but i have used simple way of setOval method of outline class. this button is for sample in this tutorial. i will make use of it next tutorial so keep subscribed with us.now put below code for oval shape of it.
drawable/ripple.xml


Below one is layout for recycler view item. RecyclerView is also list view but with some extended features like list item remove or add animation and much more. so put below file in row_layout.xml file.
layout/row_layout.xml


Step - 2 : Now your layout is set but to apply your custom theme now add style.xml file in value-v21 folder and put below code in it. you can change color codes as per your app theme.
value-v21/styles.xml


Step - 3 : Now All layout set so we move to code section. this is start up with material design so i have used simple array to display values in recycler view. put below code in main.java file.
Main.java

package com.androprogrammer.test.myapplication1;

import android.app.Activity;
import android.graphics.Outline;
import android.os.Bundle;
import android.support.v7.widget.DefaultItemAnimator;
import android.support.v7.widget.LinearLayoutManager;
import android.support.v7.widget.RecyclerView;
import android.view.Menu;
import android.view.MenuItem;
import android.view.View;
import android.view.ViewOutlineProvider;
import android.widget.Button;


public class MainActivity extends Activity
{
    private RecyclerView mRecyclerView;
    private RecyclerView.Adapter mAdapter;
    private RecyclerView.LayoutManager mLayoutManager;
    protected String [] myDataset = {"facebook", "Google+", "twitter", "Linkdin", "pintrest"};


    @Override
    protected void onCreate(Bundle savedInstanceState) {
        super.onCreate(savedInstanceState);
        setContentView(R.layout.activity_main);

        mRecyclerView = (RecyclerView) findViewById(R.id.my_recycler_view);

        Button fab = (Button) findViewById(R.id.addButton);

        ViewOutlineProvider viewOutlineProvider = new ViewOutlineProvider() {
            @Override
            public void getOutline(View view, Outline outline) {
                // Or read size directly from the view's width/height
                outline.setOval(0, 0, 56, 56);
            }
        };

        fab.setOutlineProvider(viewOutlineProvider);

        // use this setting to improve performance if you know that changes
        // in content do not change the layout size of the RecyclerView
        mRecyclerView.setHasFixedSize(true);

        // use a linear layout manager
        mLayoutManager = new LinearLayoutManager(this);
        mRecyclerView.setLayoutManager(mLayoutManager);
        mRecyclerView.setItemAnimator(new DefaultItemAnimator());

        // specify an adapter
        mAdapter = new MyAdapter(myDataset);
        mRecyclerView.setAdapter(mAdapter);

    }


    @Override
    public boolean onCreateOptionsMenu(Menu menu) {
        // Inflate the menu; this adds items to the action bar if it is present.
        getMenuInflater().inflate(R.menu.menu_main, menu);
        return true;
    }

    @Override
    public boolean onOptionsItemSelected(MenuItem item) {
        // Handle action bar item clicks here. The action bar will
        // automatically handle clicks on the Home/Up button, so long
        // as you specify a parent activity in AndroidManifest.xml.
        int id = item.getItemId();

        //noinspection SimplifiableIfStatement
        if (id == R.id.action_settings) {
            return true;
        }

        return super.onOptionsItemSelected(item);
    }
}


MyAdapter.java
package com.androprogrammer.test.myapplication1;

import android.support.v7.widget.RecyclerView;
import android.view.LayoutInflater;
import android.view.View;
import android.view.ViewGroup;
import android.widget.TextView;
import android.widget.Toast;

/**
 * Created by wasim on 07/12/14.
 */
public class MyAdapter extends RecyclerView.Adapter<myadapter .viewholder=""> {
    protected String[] mDataset;

    // Provide a reference to the views for each data item
    // Complex data items may need more than one view per item, and
    // you provide access to all the views for a data item in a view holder
    public static class ViewHolder extends RecyclerView.ViewHolder {
        // each data item is just a string in this case
        public TextView mTextView;
        public ViewHolder(View v) {
            super(v);
            mTextView = (TextView) v.findViewById(R.id.row_tv);
            v.setOnClickListener(new View.OnClickListener() {
                @Override
                public void onClick(View v)
                {
                    Toast.makeText(v.getContext(), "Clicked on " + getPosition(), Toast.LENGTH_LONG).show();
                }
            });
        }
    }

    // Provide a suitable constructor (depends on the kind of dataset)
    public MyAdapter(String[] myDataset) {
        this.mDataset = myDataset;
    }

    // Create new views (invoked by the layout manager)
    @Override
    public MyAdapter.ViewHolder onCreateViewHolder(ViewGroup parent,
                                                   int viewType) {
        // create a new view
        View v = LayoutInflater.from(parent.getContext())
                .inflate(R.layout.row_layout, parent, false);
        // set the view's size, margins, paddings and layout parameters

        ViewHolder vh = new ViewHolder(v);
        return vh;
    }

    // Replace the contents of a view (invoked by the layout manager)
    @Override
    public void onBindViewHolder(ViewHolder holder, int position) {
        // - get element from your dataset at this position
        // - replace the contents of the view with that element
        holder.mTextView.setText(mDataset[position]);

    }

    // Return the size of your dataset (invoked by the layout manager)
    @Override
    public int getItemCount() {
        return mDataset.length;
    }
}


RecyclerView.Adapter is extened like other adapters in android. view more about adapters in my previous post. in this class you have to implement view holder pattern that will assign view to each row. well there is no more changes in recycler view then list view. in list view adapter you assign view in getView method while in this case you can assign data in onBindViewholder method.


Screen Shots

Let's Start with Material Design Let's Start with Material Design

So that's it from coding side now you can run app and test it. i hope you it will run smoothly.
if you have any query comment it in below comment box.
Keep coding...