Android Wear or Let say Smart Watches are new and trending technology. Android apps are updating and they all comes with Android wear support. if you want it is in your app you can find simple Helloworld wear app tutorials easily on Google. but what if you want to explore it more let say you want to display a List view in android wear or get some kind of input from android wear app. so these tutorial is for you. In this tutorial i have created simple list in android wear app in which user click on list item and an app in mobile device gets open. for example you want to display list of songs in android wear app and on the click of that you want to change song in your device or let say you can display to do list on android wear and on the click of list item you can open to do item details inside your mobile app. this list can be infinite and its totally depends on you and apps in android.

Steps
Note - Above steps are for Android studio wizard. Sorry for eclipse developers (Please migrate to AS)
Step - 2
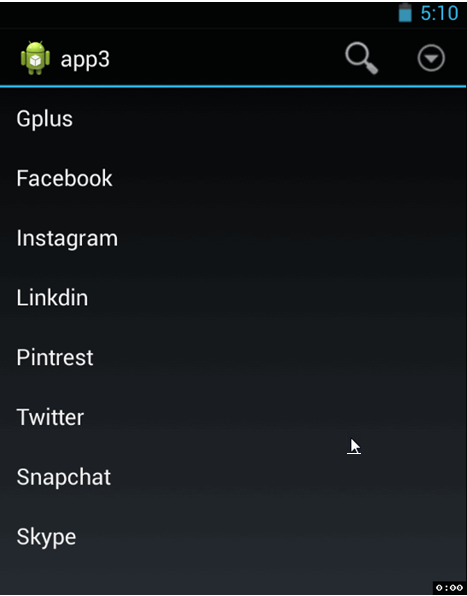
So our android wear module is added. I hope you have no issue in above steps. in the main activity or launcher activity i have created a List (basically list of my tutorials). For learning purpose you can start with same and after that you can change it is as you want. so put below code in appropriate layout files.
Step - 3
List layout is done in Step -2. now let's jump to coding part where i have initialize WearableListView with Array adapter. Using GoogleApiClient i have checked if there is a connection to a android wear from an app or not. we can get all connected nodes or devices using Wearable.NodeApi.getConnectedNodes method. check below code and make sure you understand or go through it for one time so you know what is actually going on. otherwise you will get confused.
Please add above lines of code in manifest file of wear module. because we are using google play service to communicate. otherwise it will give error.
Step - 4
Now android wear module is ready. you can run it separately on emulator and check it. now we require a bridge which can pass android wear message to android mobile app. so when user click on list item in android wear a service get some sort of message and on the basis of that message we start appropriate activity. Using WearableListenerService we will create service which will do same for our app.
Step - 5
In Mobile app put below code to register your service.
That's it...
Now run wear module in android wear emulator and mobile module in device. make sure you are connected. I hope you understand the full tutorial. you can get full source code from my Github repo. if you find it helpful please share this tutorial.
Keep coding...

Steps
Step - 1
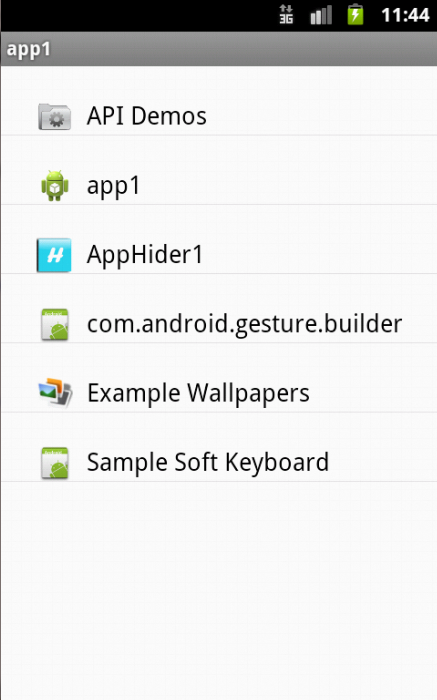
First of let i start with adding a android wear module in development. If you have already added android wear module in you app you can skip this step. To add right click on your app root folder (name of your app folder) and go to New > Module. Select Android Wear Module and click on next. Give same name in Application name (Mobile app name) and in Module Name write wear. so you can differentiate them. Make sure you give same package name also. because when you send some data through mobile app or wear app MessageApi will check for the same package and pass that data. so if you give different name you won't be able to send or receive data. On the next screen select Blank Wear Activity and on the next screen give proper name to it.Note - Above steps are for Android studio wizard. Sorry for eclipse developers (Please migrate to AS)
Step - 2
So our android wear module is added. I hope you have no issue in above steps. in the main activity or launcher activity i have created a List (basically list of my tutorials). For learning purpose you can start with same and after that you can change it is as you want. so put below code in appropriate layout files.
wear/layout/activity_list.xml
<?xml version="1.0" encoding="utf-8"?>
<android.support.wearable.view.WatchViewStub
   xmlns:android="http://schemas.android.com/apk/res/android"
    xmlns:app="http://schemas.android.com/apk/res-auto"
    xmlns:tools="http://schemas.android.com/tools"
    android:id="@+id/watch_view_stub"
    android:layout_width="match_parent"
    android:layout_height="match_parent"
    android:background="#e4e5e5"
    app:rectLayout="@layout/rect_activity_list"
    app:roundLayout="@layout/round_activity_list"
    tools:context=".ListActivity"
    tools:deviceIds="wear">
</android.support.wearable.view.WatchViewStub>
wear/layout/rect_activity_list.xml & wear/layout/round_activity_list.xml
<?xml version="1.0" encoding="utf-8"?>
<android.support.wearable.view.BoxInsetLayout
    xmlns:android="http://schemas.android.com/apk/res/android"
    xmlns:tools="http://schemas.android.com/tools"
    android:layout_width="match_parent"
    android:layout_height="match_parent"
    android:fitsSystemWindows="true"
    tools:context=".ListActivity"
    tools:deviceIds="wear_round">
        <android.support.wearable.view.WearableListView
            android:id="@+id/listView1"
            android:layout_width="match_parent"
            android:layout_height="wrap_content"
            android:padding="5dp"
            android:overScrollMode="never" />
        <TextView
            android:id="@+id/tv_header"
            android:layout_width="wrap_content"
            android:layout_height="40dp"
            android:layout_gravity="top|center"
            android:textSize="30sp"
            android:layout_marginTop="10dp"
            android:textColor="#52bf90"
            android:fontFamily="sans-serif-light"
            android:text="@string/app_name"/>
</android.support.wearable.view.BoxInsetLayout>
Step - 3
List layout is done in Step -2. now let's jump to coding part where i have initialize WearableListView with Array adapter. Using GoogleApiClient i have checked if there is a connection to a android wear from an app or not. we can get all connected nodes or devices using Wearable.NodeApi.getConnectedNodes method. check below code and make sure you understand or go through it for one time so you know what is actually going on. otherwise you will get confused.
wear/java/ListActivity.java
package com.androprogrammer.tutorials;
import android.app.Activity;
import android.content.Context;
import android.os.Bundle;
import android.support.wearable.view.WatchViewStub;
import android.support.wearable.view.WearableListView;
import android.util.Log;
import android.view.LayoutInflater;
import android.view.ViewGroup;
import android.widget.TextView;
import android.widget.Toast;
import com.google.android.gms.common.ConnectionResult;
import com.google.android.gms.common.api.GoogleApiClient;
import com.google.android.gms.common.api.ResultCallback;
import com.google.android.gms.wearable.MessageApi;
import com.google.android.gms.wearable.Node;
import com.google.android.gms.wearable.NodeApi;
import com.google.android.gms.wearable.Wearable;
import java.util.ArrayList;
public class ListActivity extends Activity implements GoogleApiClient.ConnectionCallbacks, GoogleApiClient.OnConnectionFailedListener,WearableListView.ClickListener {
    private WearableListView mListView;
    private ArrayList<String> listItems;
    Node mNode; // the connected device to send the message to
    GoogleApiClient mGoogleApiClient;
    private boolean mResolvingError=false;
    public static String SERVICE_CALLED_WEAR = "WearListClicked";
    public static String TAG = "WearListActivity";
    @Override
    protected void onCreate(Bundle savedInstanceState) {
        super.onCreate(savedInstanceState);
        setContentView(R.layout.activity_list);
        //Connect the GoogleApiClient
        mGoogleApiClient = new GoogleApiClient.Builder(this)
                .addApi(Wearable.API)
                .addConnectionCallbacks(this)
                .addOnConnectionFailedListener(this)
                .build();
        initializeListItems();
        final WatchViewStub stub = (WatchViewStub) findViewById(R.id.watch_view_stub);
        stub.setOnLayoutInflatedListener(new WatchViewStub.OnLayoutInflatedListener() {
            @Override
            public void onLayoutInflated(WatchViewStub stub) {
                mListView = (WearableListView) stub.findViewById(R.id.listView1);
                mListView.setAdapter(new MyAdapter(ListActivity.this, listItems));
                mListView.setClickListener(ListActivity.this);
            }
        });
    }
    private void initializeListItems() {
        listItems = new ArrayList<>();
        listItems.add("Async File Read");
        listItems.add("Battery Status");
        listItems.add("Volume Setting");
        listItems.add("Frame Animation");
        listItems.add("Video Player");
        listItems.add("Circular Image View");
        listItems.add("Track User Location");
        listItems.add("Take Image");
        listItems.add("Image Grid View");
        listItems.add("Image Switcher");
        listItems.add("Tabs with Toolbar");
        listItems.add("Icon Tabs with Toolbar");
        listItems.add("Push Notification");
    }
    @Override
    protected void onStart() {
        super.onStart();
        if (!mResolvingError) {
            mGoogleApiClient.connect();
        }
    }
    /**
     * Resolve the node = the connected device to send the message to
     */
    private void resolveNode() {
        Wearable.NodeApi.getConnectedNodes(mGoogleApiClient)
                .setResultCallback(new ResultCallback<NodeApi.GetConnectedNodesResult>() {
                    @Override
                    public void onResult(NodeApi.GetConnectedNodesResult nodes) {
                        for (Node node : nodes.getNodes()) {
                    mNode = node;
                }
            }
        });
    }
    @Override
    public void onConnected(Bundle bundle) {
        resolveNode();
    }
    @Override
    public void onConnectionSuspended(int i) {
    }
    @Override
    public void onConnectionFailed(ConnectionResult connectionResult) {
    }
    /**
     * Send message to mobile handheld
     */
    private void sendMessage(String Key) {
        if (mNode != null && mGoogleApiClient!= null && mGoogleApiClient.isConnected()) {
            Log.d(TAG, "-- " + mGoogleApiClient.isConnected());
            Wearable.MessageApi.sendMessage(
                    mGoogleApiClient, mNode.getId(), SERVICE_CALLED_WEAR + "--" + Key, null).setResultCallback(
                    new ResultCallback<MessageApi.SendMessageResult>() {
                        @Override
                        public void onResult(MessageApi.SendMessageResult sendMessageResult) {
                            if (!sendMessageResult.getStatus().isSuccess()) {
                                Log.e(TAG, "Failed to send message with status code: "
                                        + sendMessageResult.getStatus().getStatusCode());
                            }
                        }
                    }
            );
        }
    }
    @Override
    public void onClick(WearableListView.ViewHolder viewHolder) {
        TextView view = (TextView) viewHolder.itemView.findViewById(R.id.row_tv_name);
        String Key = view.getText().toString();
        Log.d(TAG, Key);
        sendMessage(Key);
    }
    @Override
    public void onTopEmptyRegionClick() {
        Toast.makeText(this, "You tapped on Top empty area", Toast.LENGTH_SHORT).show();
    }
    private class MyAdapter extends WearableListView.Adapter {
        private final LayoutInflater mInflater;
        private ArrayList<String> data;
        private MyAdapter(Context context, ArrayList<String> listItems) {
            mInflater = LayoutInflater.from(context);
            data = listItems;
        }
        @Override
        public WearableListView.ViewHolder onCreateViewHolder(ViewGroup parent, int viewType) {
            return new WearableListView.ViewHolder(
                    mInflater.inflate(R.layout.row_wear_list, null));
        }
        @Override
        public void onBindViewHolder(WearableListView.ViewHolder holder, int position) {
            TextView view = (TextView) holder.itemView.findViewById(R.id.row_tv_name);
            view.setText(data.get(position));
            holder.itemView.setTag(position);
        }
        @Override
        public int getItemCount() {
            return data.size();
        }
    }
}
wear/layout/row_wear_list.xml
<?xml version="1.0" encoding="utf-8"?>
<LinearLayout xmlns:android="http://schemas.android.com/apk/res/android"
    android:layout_width="match_parent"
    android:layout_height="80dp"
    android:orientation="horizontal"
    android:padding="8dp"
    android:gravity="center">
    <TextView
        android:textAppearance="?android:attr/textAppearanceMedium"
        android:text="Medium Text"
        android:textStyle="bold"
        android:ellipsize="end"
        android:maxEms="15"
        android:padding="10dp"
        android:ems="15"
        android:background="@android:color/white"
        android:textColor="@android:color/black"
        android:fontFamily="sans-serif-condensed-light"
        android:gravity="center"
        android:layout_height="match_parent"
        android:layout_width="wrap_content"
        android:textSize="16sp"
        android:id="@+id/row_tv_name" />
</LinearLayout>
wear/AndroidManifest.xml
<meta-data android:name="com.google.android.gms.version"
            android:value="@integer/google_play_services_version" />
Please add above lines of code in manifest file of wear module. because we are using google play service to communicate. otherwise it will give error.
Step - 4
Now android wear module is ready. you can run it separately on emulator and check it. now we require a bridge which can pass android wear message to android mobile app. so when user click on list item in android wear a service get some sort of message and on the basis of that message we start appropriate activity. Using WearableListenerService we will create service which will do same for our app.
mobile/java/WearListCallListenerService.java
package com.androprogrammer.tutorials.services;
import android.content.Intent;
import android.util.Log;
import com.androprogrammer.tutorials.activities.Listactivity;
import com.google.android.gms.wearable.MessageEvent;
import com.google.android.gms.wearable.WearableListenerService;
/**
 * Created by Wasim on 08-05-2015.
 */
public class WearListCallListenerService extends WearableListenerService {
    public static String SERVICE_CALLED_WEAR = "WearListClicked";
    @Override
    public void onMessageReceived(MessageEvent messageEvent) {
        super.onMessageReceived(messageEvent);
        String event = messageEvent.getPath();
        Log.d("Listclicked", event);
        String [] message = event.split("--");
        if (message[0].equals(SERVICE_CALLED_WEAR)) {
            startActivity(new Intent((Intent) Listactivity.getInstance().tutorials.get(message[1]))
                    .addFlags(Intent.FLAG_ACTIVITY_NEW_TASK));
        }
    }
}
Step - 5
In Mobile app put below code to register your service.
mobile/AndroidManifest.xml
<service android:name=".services.WearListCallListenerService">
            <intent-filter>
                <action android:name="com.google.android.gms.wearable.BIND_LISTENER" />
            </intent-filter>
        </service>
That's it...
Now run wear module in android wear emulator and mobile module in device. make sure you are connected. I hope you understand the full tutorial. you can get full source code from my Github repo. if you find it helpful please share this tutorial.
Keep coding...